How to invite guests to the live and put them on screen (Live Studio)
Copy the link from the Invite tab and send it to the guest; they enter with name and e-mail, wait in the waiting room, and you put them on screen from the People tab. See what the guest sees, how to mute, take off screen and remove.
Interviews, talk shows, a service with two pastors, a class with a guest: Live Studio lets someone else take part in the live with just a link, no Ciclano account and nothing to install.
Where it is: Live Studio › Invite and People tabs.
1. Send the link
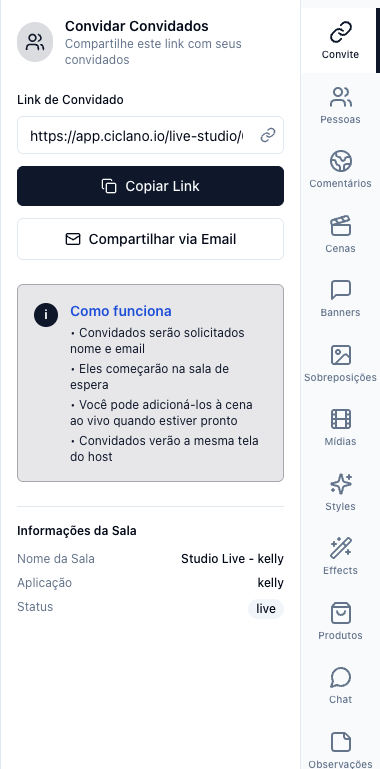
The numbers in parentheses refer to the image.
In the Invite tab (1), click Copy Link and send it by WhatsApp, or use Share via Email. The link belongs to your application's room and works for anyone who has it — do not post it in the open.
2. What the guest sees
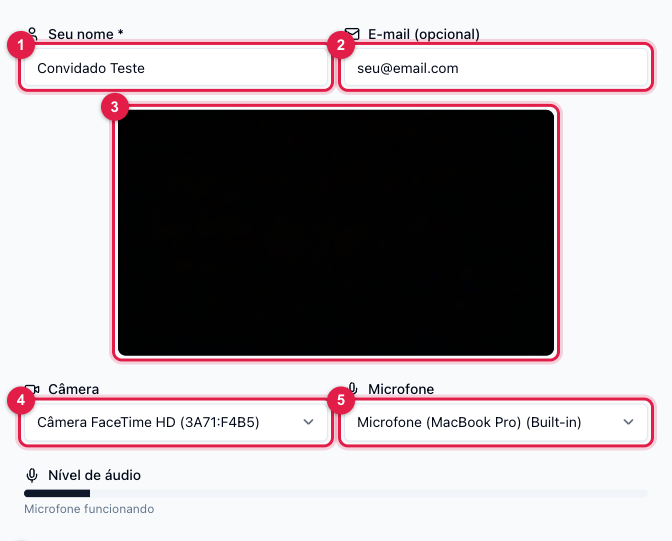
The guest opens the link, allows camera and microphone in the browser, types their name (1) — that is what appears on their label in the live —, optionally the e-mail (2), checks the preview (3), picks camera (4) and microphone (5) and clicks Enter the room, just below.
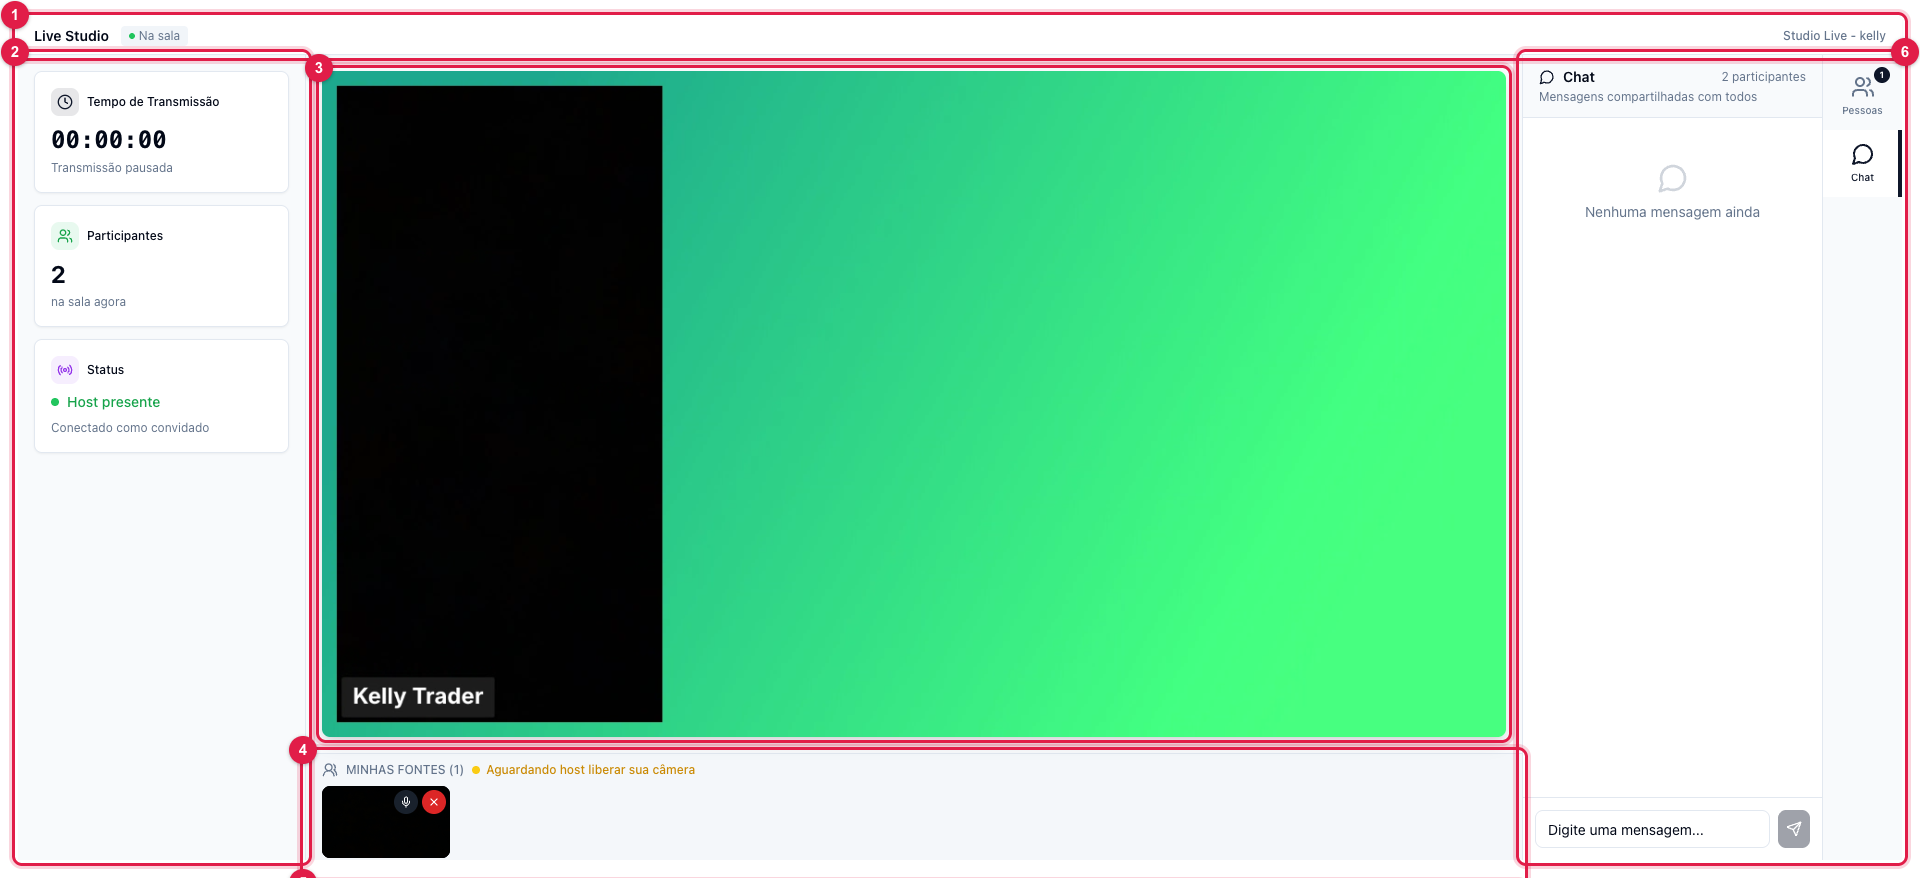
Inside, the guest sees the same screen as you (3), stays in the waiting room (4) until you let them in, and has their own controls (5): turn off the camera, mute, share their screen, change device and leave. Through the Chat (6) they talk to you before going on air.
3. Put on screen
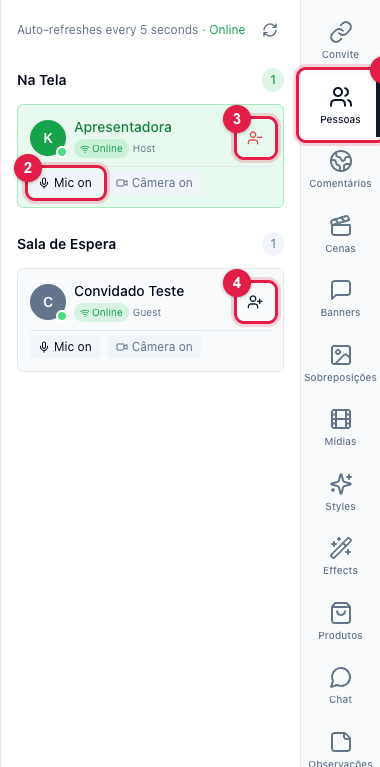
In the People tab (1) the guest appears under Waiting Room, with camera and microphone indicated. Click Add to screen (4): they enter the canvas and the layout adjusts — choose Side by Side for the two next to each other.
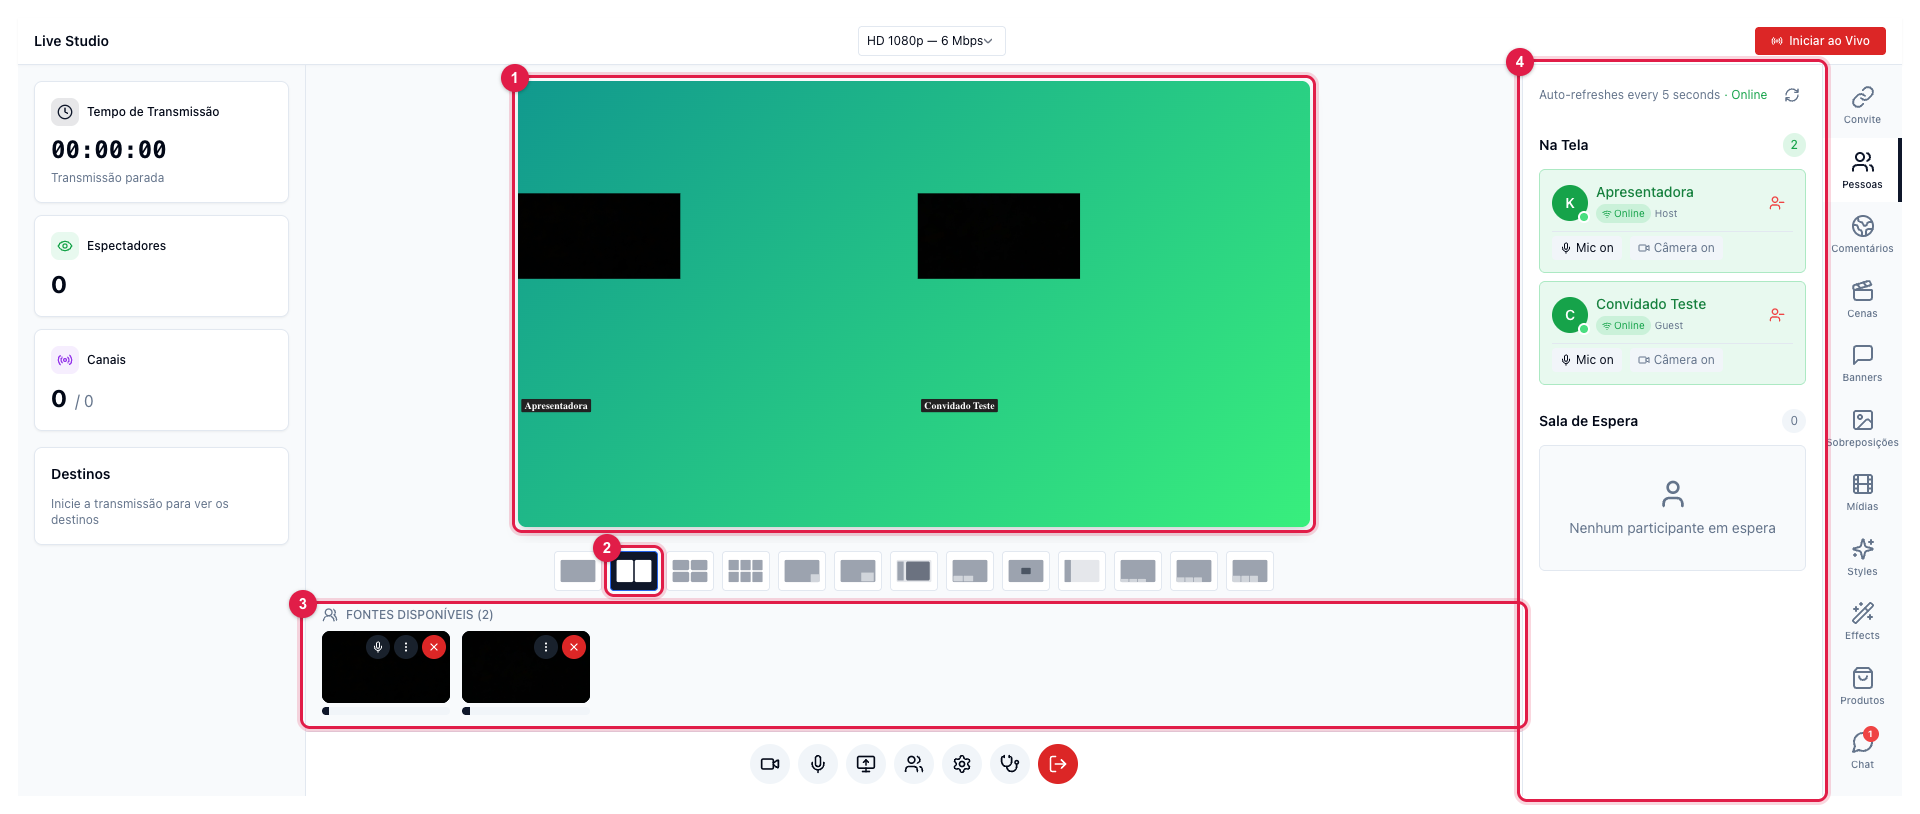
During
- Mute (2) cuts the participant's microphone in the live (they can unmute on their side). Useful for background noise.
- Remove from screen (3) sends the person back to the waiting room without disconnecting them — for a break, or to switch interviewees.
- Remove (in the participant's options) disconnects the person from the room.
- The guest can share their screen; the screen enters as a source and you put it on the canvas like any other.
Tips
- Ask the guest to use headphones: it avoids echo between their audio and yours.
- Test beforehand: both of you enter the room 10 minutes early, without being live, and check audio and framing.
- The display name comes from what the person typed; if they mistyped it, they can edit it from their own panel or you ask them to re-enter.