How to create your radio's Web Player and publish it on the website
The Web Player is your radio's customized player page: logo, colors, slogan, social networks, sharing. See how to create it, choose the type (full page, mini or floating button), publish and get the embed code.
The Web Player is your radio's "branded" player: a page with your logo, your colors, the slogan, the social links, the song playing and the share button. You can use it as its own page (the panel gives a public address) or embed it on your website by iframe or script. You can create more than one: one for the website, another as a popup, another as a floating button.
Where it is: Applications › your radio › Web Player.
The numbers in parentheses refer to the image.
1. Create the player and choose the type
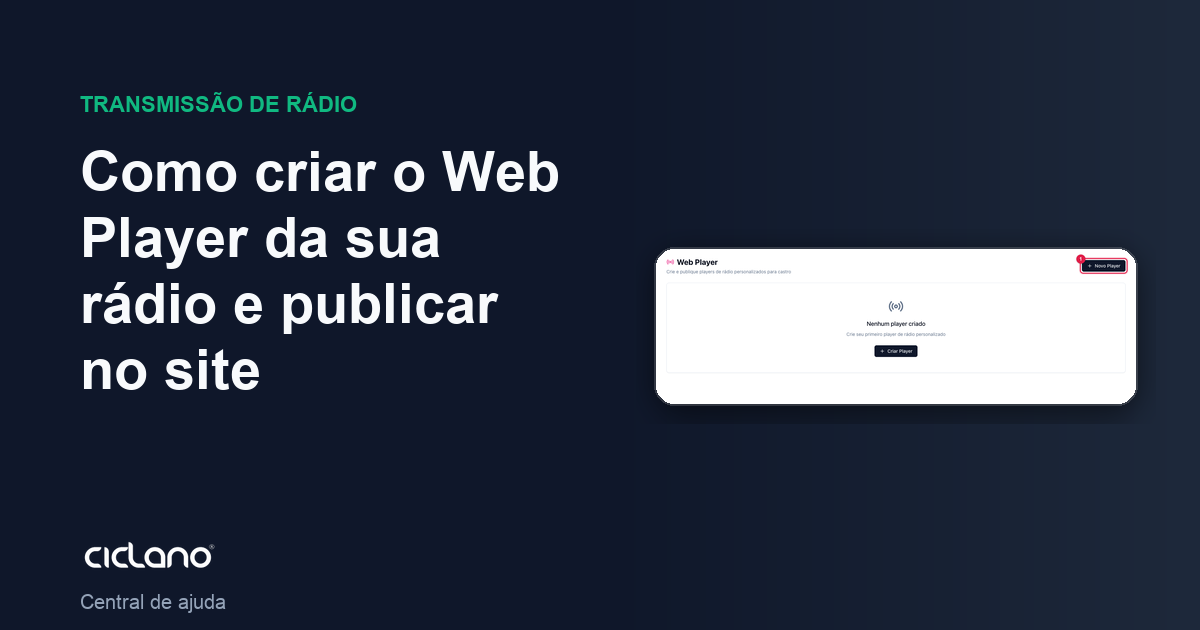
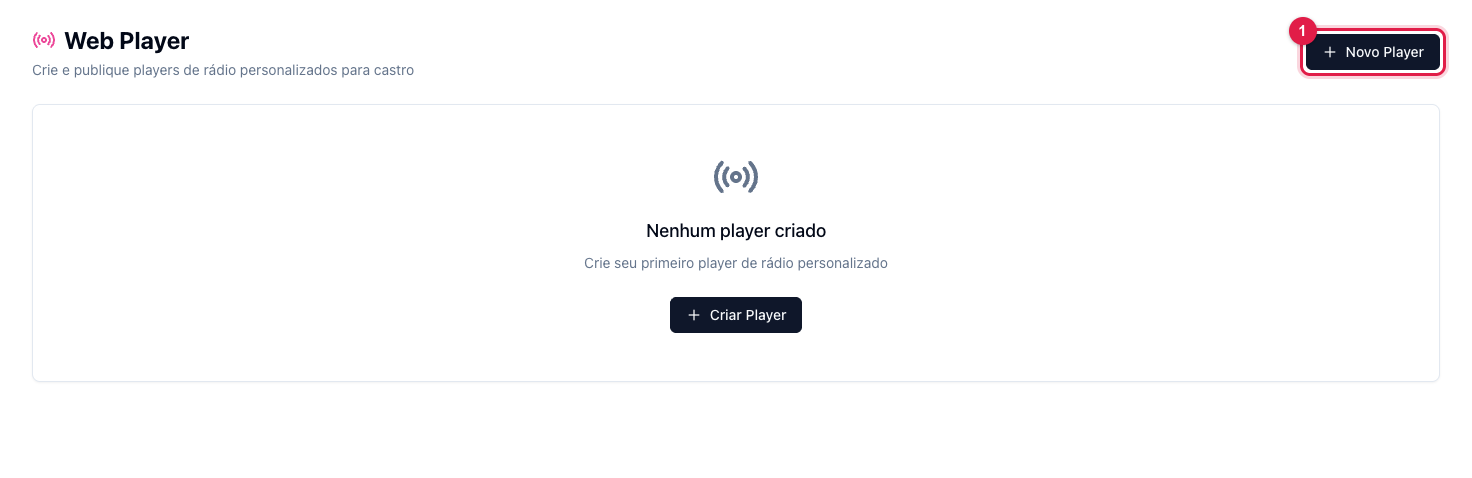
- Click New Player (1 in the first image).
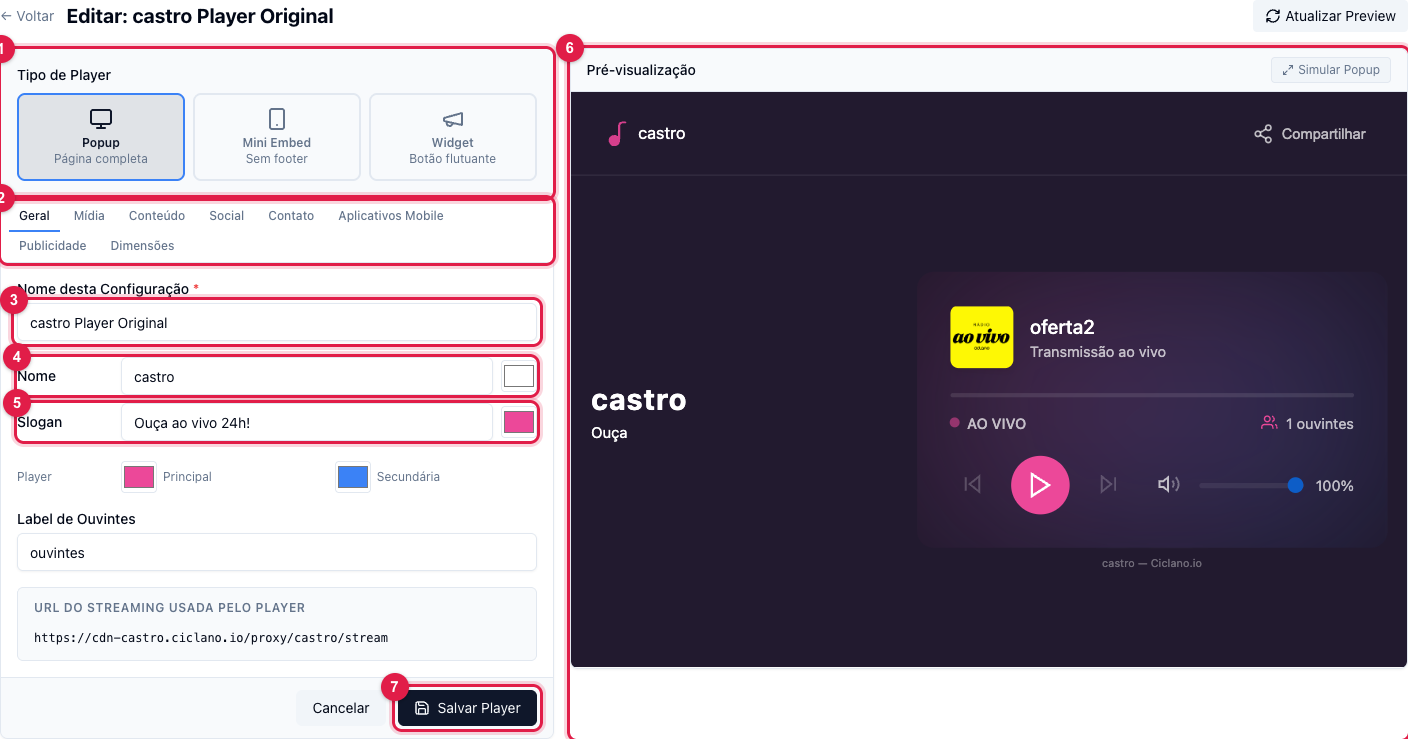
- In Player Type (1) choose: Popup / Full page (a whole page, with background, to open in a new window or use as the radio's site), Mini Embed (just the player bar, no footer, to embed on the website) or Widget / Floating button (a button that stays in the corner of the site and opens the player).
- Name of this Configuration (3) is only for you to identify it in the list. Name (4) and Slogan (5) appear in the player; the little square next to each sets the text color. Below, the player's Primary and Secondary colors and the Listeners Label (the word next to the listener count).
- The streaming URL used by the player already comes filled with the radio's universal link.
- Follow the result in the Preview (6); Refresh Preview at the top forces the update, and Simulate Popup opens it as the listener will see it.
2. Media: logo and background
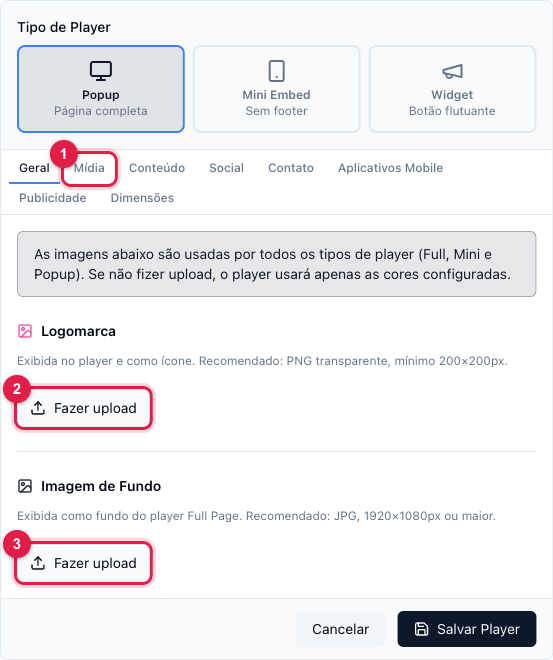
In the Media tab (1), upload the Logo (2) — transparent PNG, at least 200×200 px; it shows in the player and as the icon — and the Background Image (3) of the full-page player (JPG, 1920×1080 or larger). Without images, the player uses only the colors.
3. Content, Social and Contact
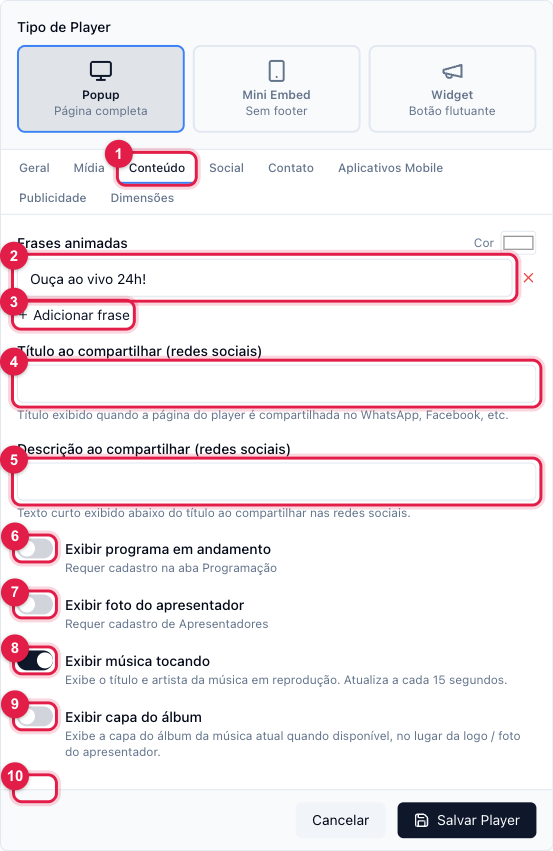
- Animated phrases (2 and 3): short phrases that alternate in the player ("Listen live 24h!", "Request your song"). Each with its own color.
- Title (4) and description when sharing (5): what shows when someone sends the player link on WhatsApp or Facebook.
- The switches (6 to 10) turn on and off what the player shows: current program and presenter photo (they depend on Program Schedule and Presenters), song playing, album cover and listener count.
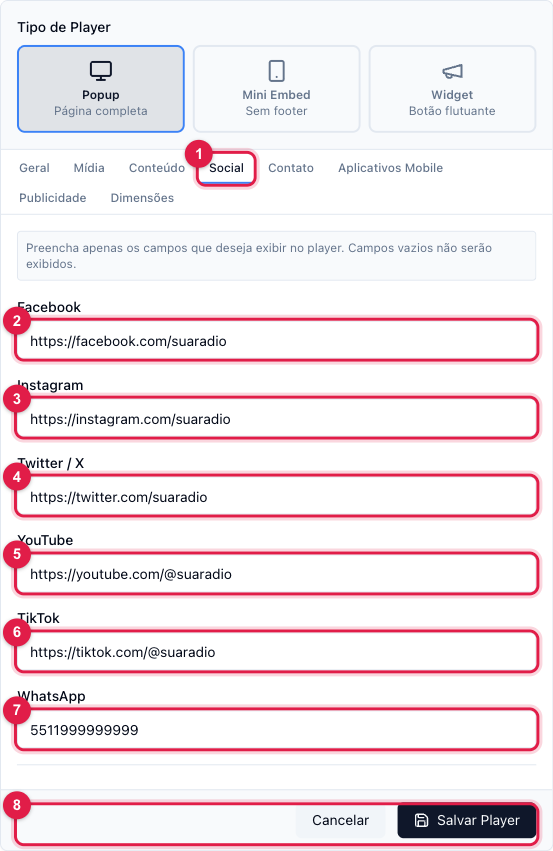
In the Social tab, fill in only the networks you want to show (2 to 7): an empty field does not show. The sharing text (8) is the ready message that goes out when the listener shares on WhatsApp.
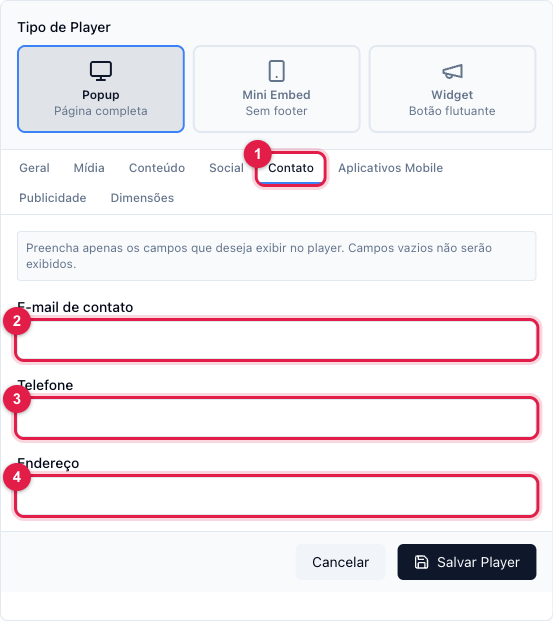
In Contact, e-mail (2), phone (3) and address (4) — they also only show if filled in.
4. Dimensions
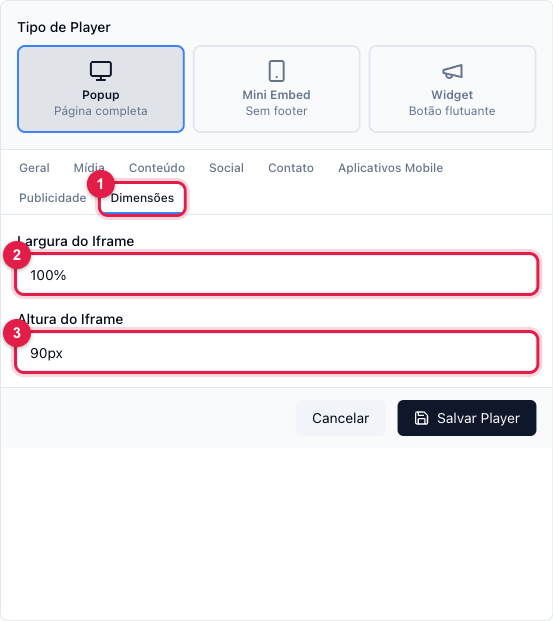
The width (2) and height (3) of the iframe when you embed the player on the website. It accepts pixels or percentage ("100%", "600px").
5. Save and publish
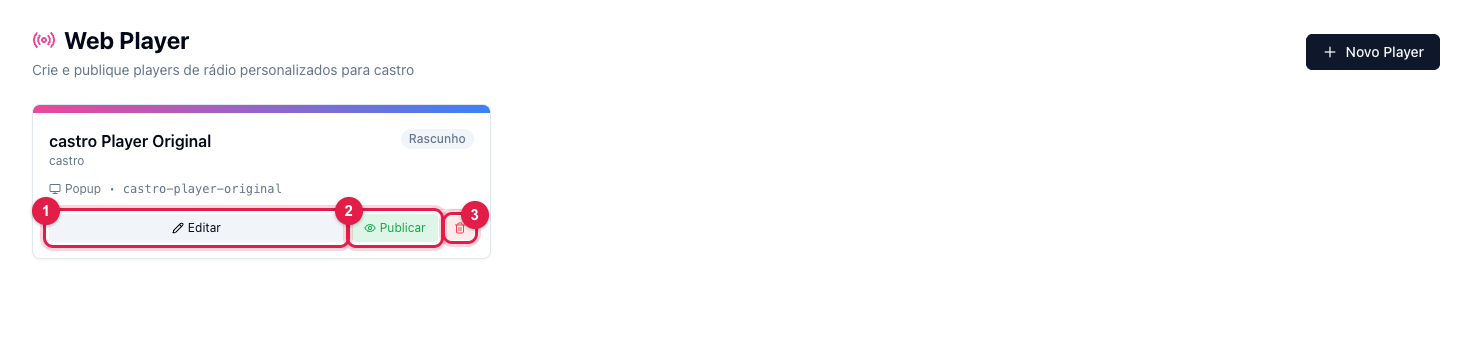
Click Save Player (7 in the editor) and then ← Back. The player shows in the list as a Draft: it exists, but has no public address yet. Click Publish (2).
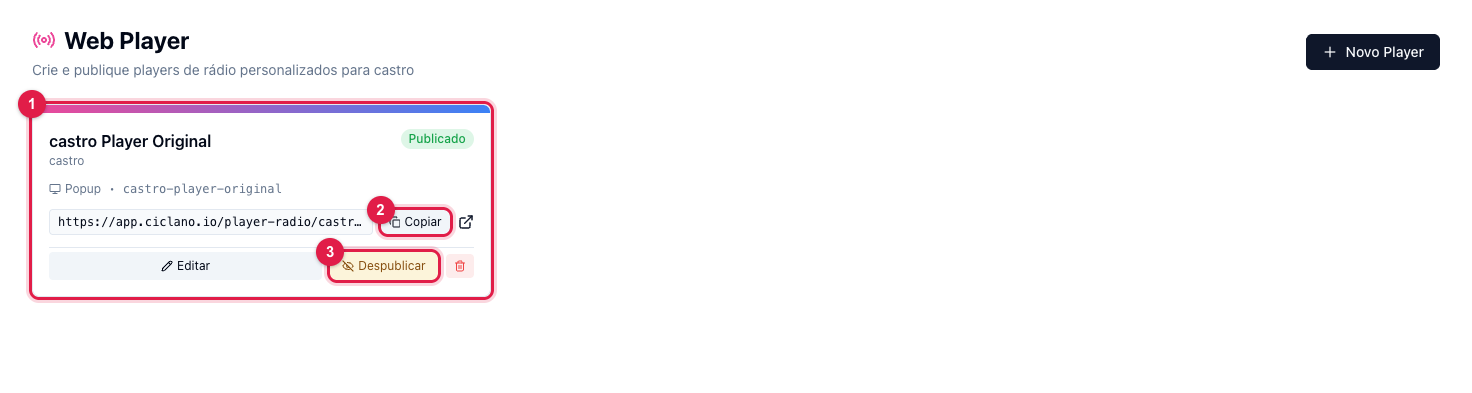
Published, the card shows the public URL (1) — the player page, ready to promote — and Unpublish (3) takes it off air without deleting.
6. Get the code for the website
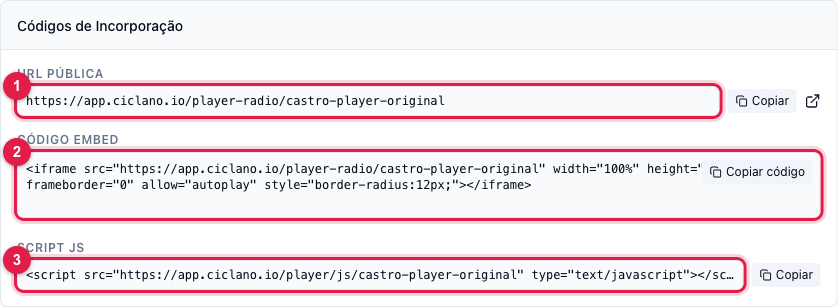
With the player published, open Edit: at the end of the form, Embed Codes appears. Copy the embed code (2) to paste in an HTML block of your website (it uses the dimensions from the Dimensions tab) or the JS script (3), which is the way to add the floating button. The public URL (1) serves direct links and social networks.
What to do if…
- I changed something and the website is the same. Save the player and reload the website page; if the site has a cache, clear it.
- I want two different players. Create another with New Player: each has its own configuration, address and code.
- I need ads or the app links. See How to add ads and app links to the Web Player.