How to go live with OBS Studio (step by step)
Copy the RTMP server and the key from the panel, paste them in OBS Settings › Stream (Custom service), start the broadcast in the panel and in OBS and follow the Live status. Step by step with screenshots.
OBS Studio is free and the most used encoder for going live. The path is always the same: the panel gives you an RTMP server and a stream key; you paste both in OBS; OBS sends the video to the server and Ciclano distributes it to the player and to the marked destinations.
Where it is: Applications › your video application › Home, RTMP button.
1. Get the credentials from the panel
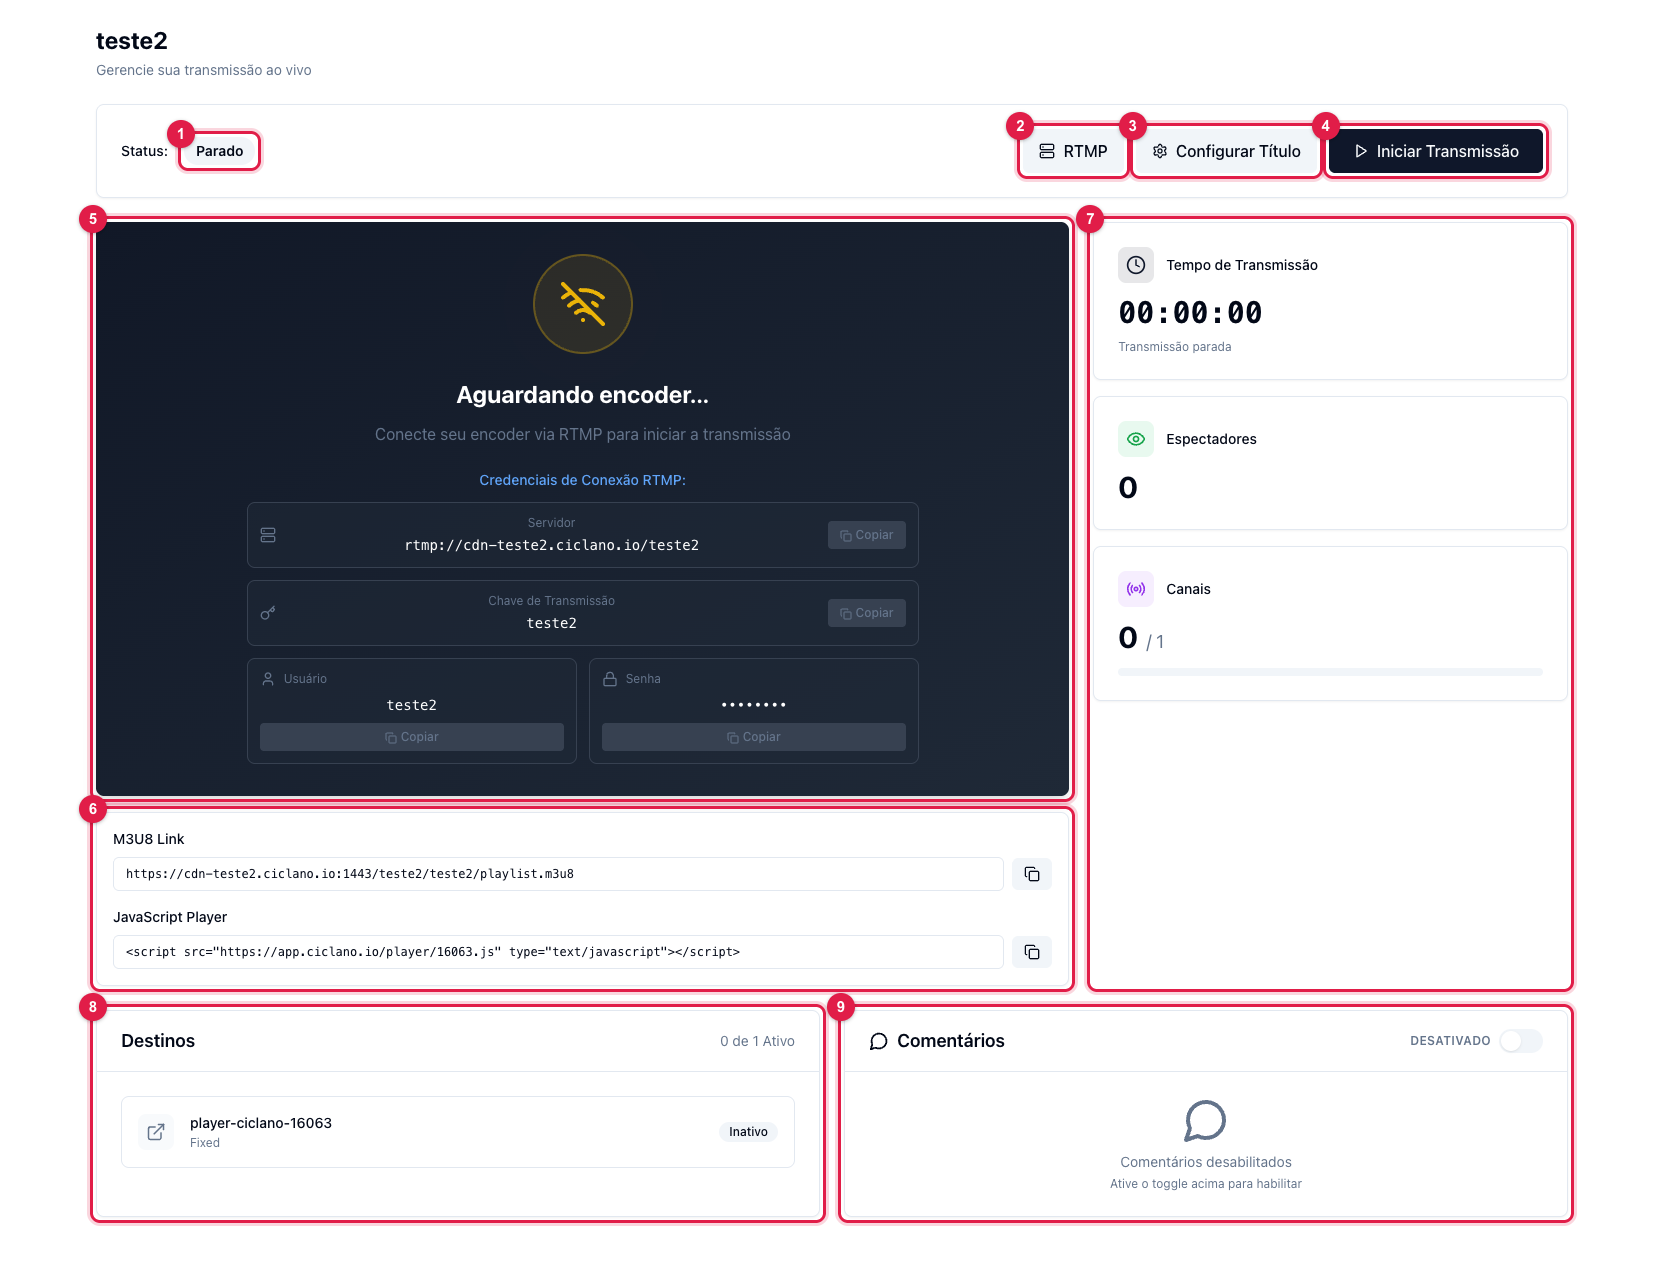
The numbers in parentheses refer to the image.
While the broadcast is Stopped (1), the player itself (5) shows Server, Stream Key, User and Password, each with a Copy button. If you prefer the window, click RTMP (2):
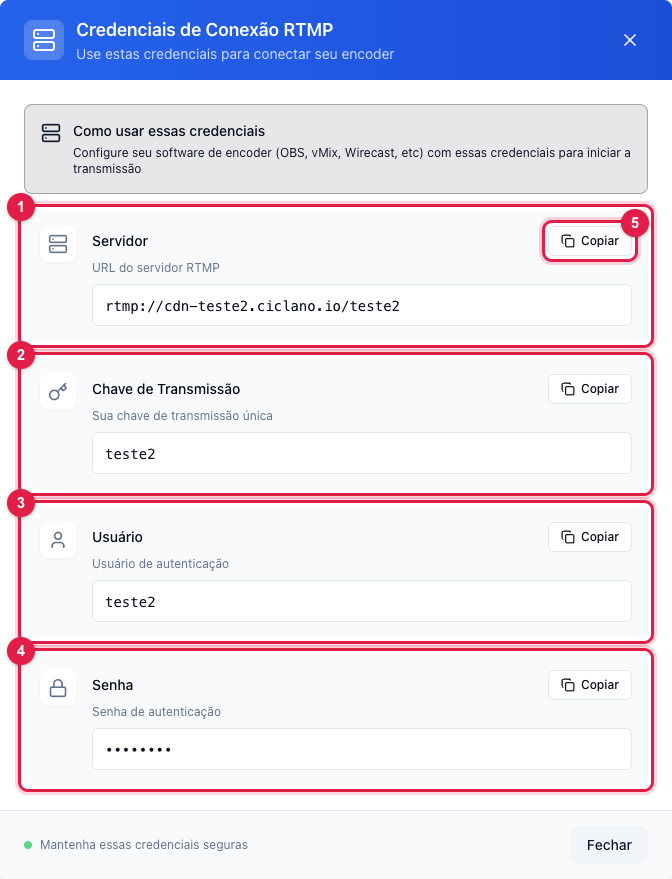
You will use the Server (1) and the Key (2). User (3) and Password (4) only come in if your application requires encoder authentication (most do not; if OBS does not connect, come back here and fill in both). The Copy button (5) copies the exact value, with no trailing space — prefer it to typing.
2. Set up OBS
- Open OBS and go to Settings (OBS menu › Settings on Mac, or the Settings button in the bottom-right corner) › Stream tab.
- In Service, choose Custom….
- In Server, paste the Server value from the panel (it starts with
rtmp://). - In Stream Key, paste the Stream Key from the panel.
- If your application requires authentication: check Use authentication and fill in User and Password with the panel's values. Otherwise, leave it unchecked.
- In the Output tab, a good starting point is Video bitrate 2500 kbps and audio 160 kbps (AAC), x264 encoder or your machine's hardware encoder. In the Video tab, 1280×720 at 30 fps works on any reasonable connection; 1920×1080 needs at least 5 Mbps of stable upload.
- Click OK.
3. Build the scene and go on air
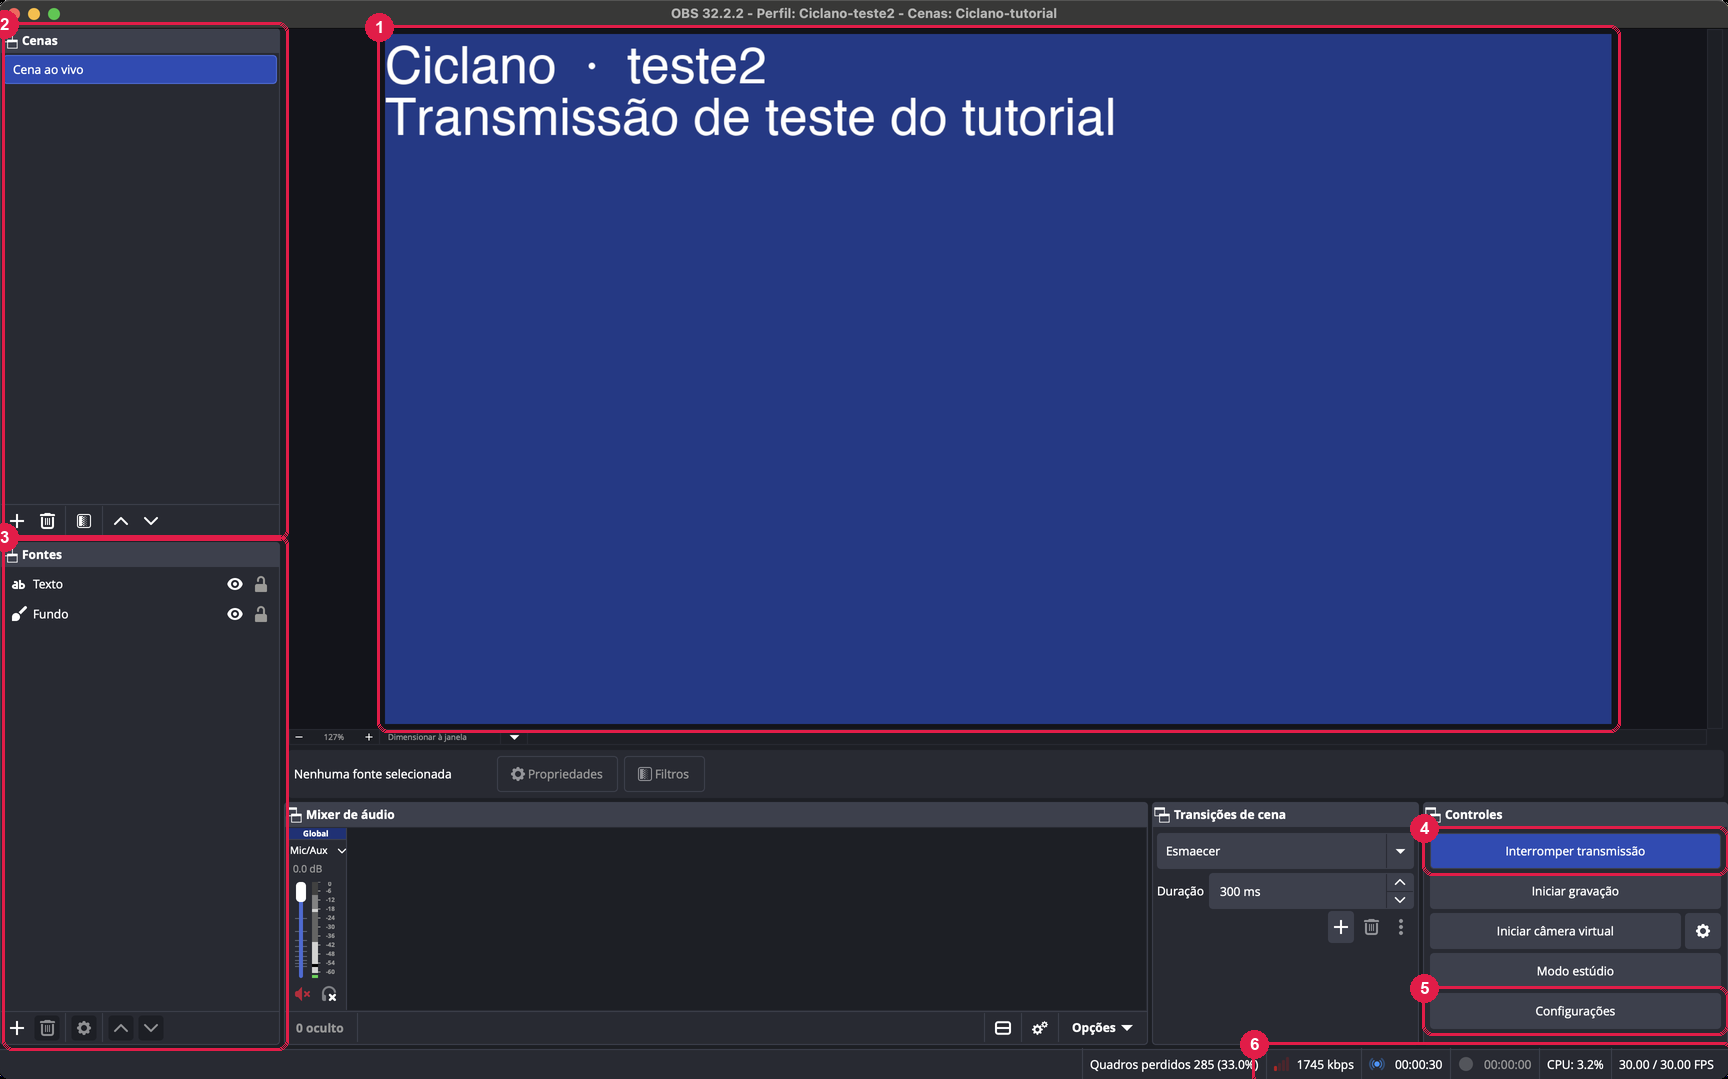
- In Sources (3), click + and add what will appear: Video Capture Device (the camera), Display Capture, Image (logo), Text. The result shows in the preview (1).
- In the Ciclano panel, click Start Transmission (4 in the first screenshot). The status goes to Pending with "Waiting for encoder…".
- In OBS, click Start Streaming (4). In a few seconds the status bar (6) shows the kbps and the time, and the panel switches to Live:
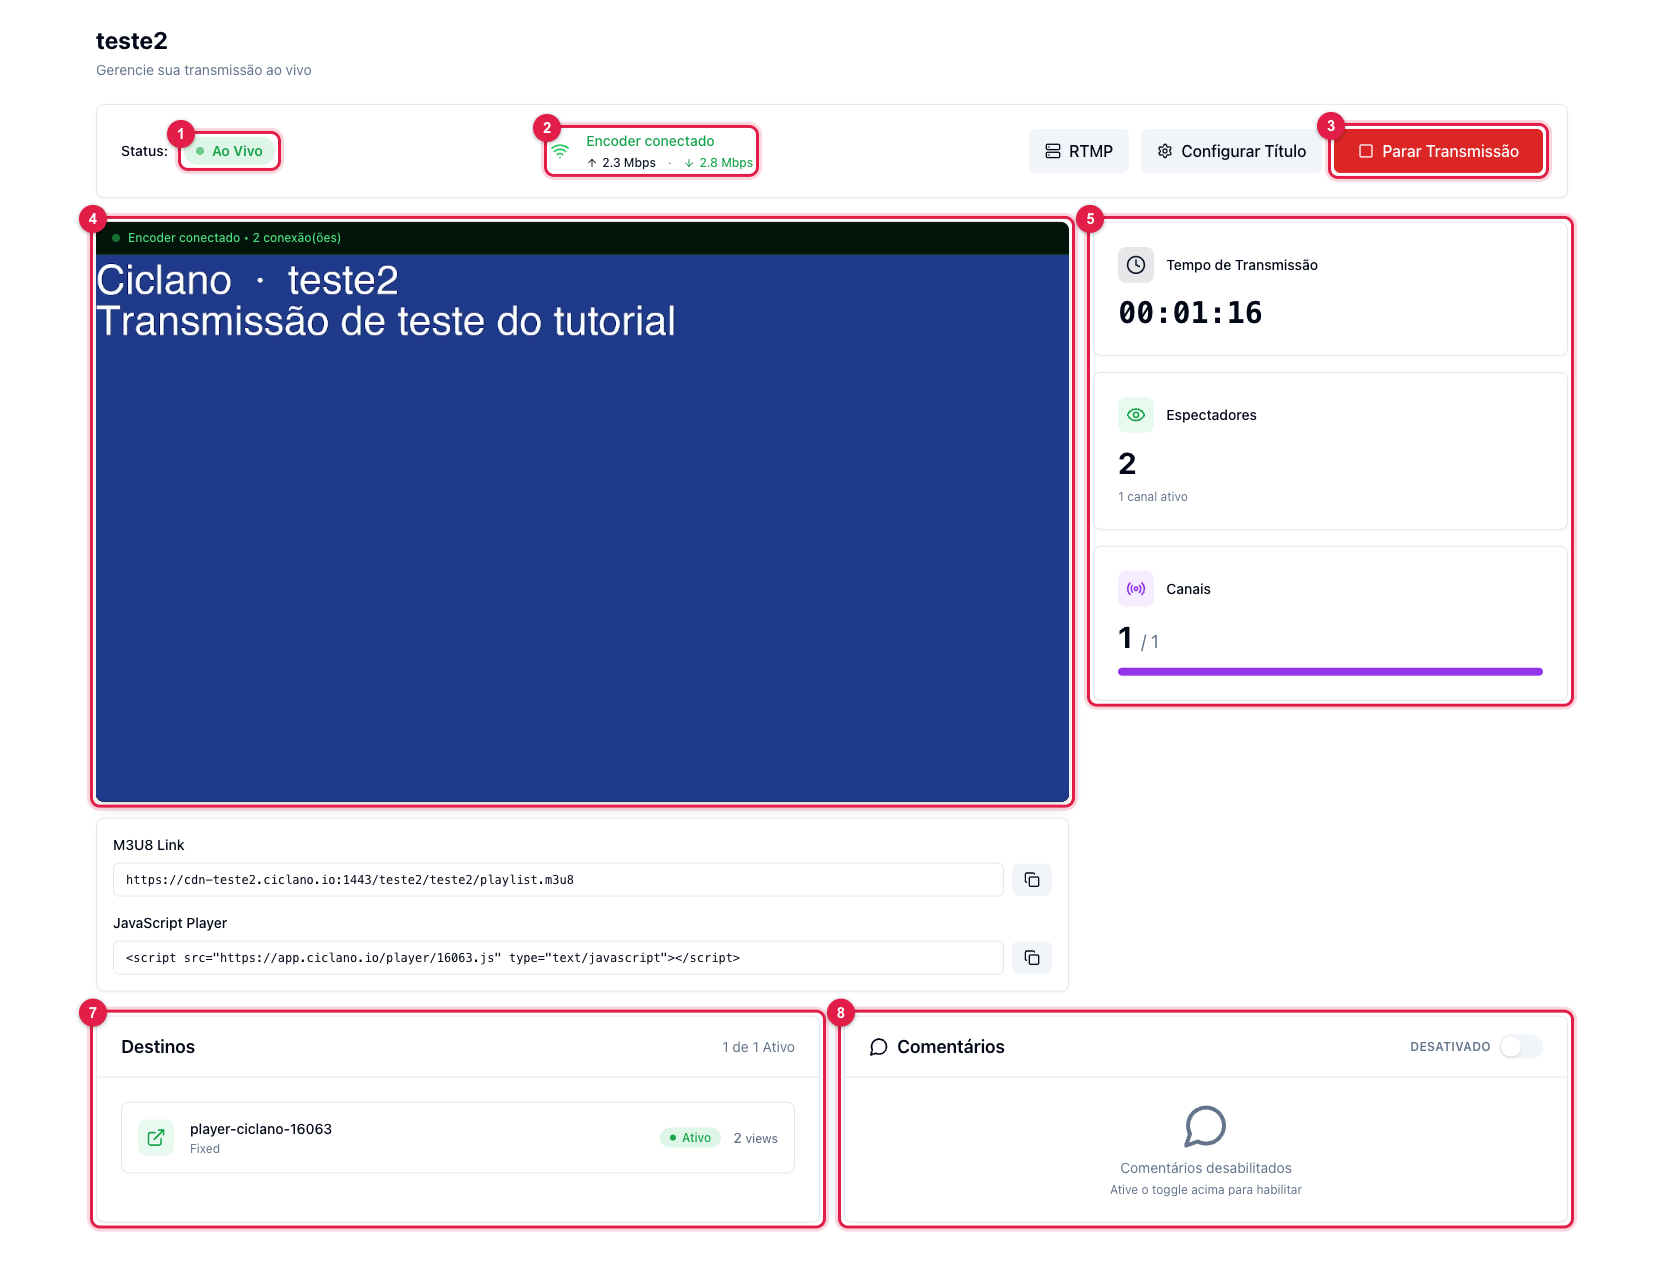
Check the video in the player (4) — it runs a few seconds behind OBS, that is normal. The rates in (2) should stay close to what you set in OBS; if the incoming rate drops a lot or the OBS status bar shows dropped frames climbing, your internet cannot keep up: lower the bitrate or the resolution.
4. To end
Click Stop Streaming in OBS and then Stop Transmission (3) in the panel. Stopping only in OBS leaves the panel's broadcast Pending, waiting for the encoder to come back; stopping only in the panel takes down the destinations but OBS keeps sending. Do both.
Common problems
- OBS says "Failed to connect to server": check that you copied the whole Server and the Key with no spaces, and that the application is active. If the application requires authentication, check Use authentication and fill in user and password.
- The panel stays Pending: OBS is not sending (see whether its button says Stop Streaming) or is sending to another key. In Logs › Encoder you can see whether the connection arrived.
- Live in the panel, but nothing on YouTube or Facebook: the channel is not marked in Destinations or the account access expired. See Logs › Channels.
- Stuttering image: dropped frames in OBS = not enough upload. Use a cable instead of Wi-Fi, lower the bitrate, close parallel uploads.